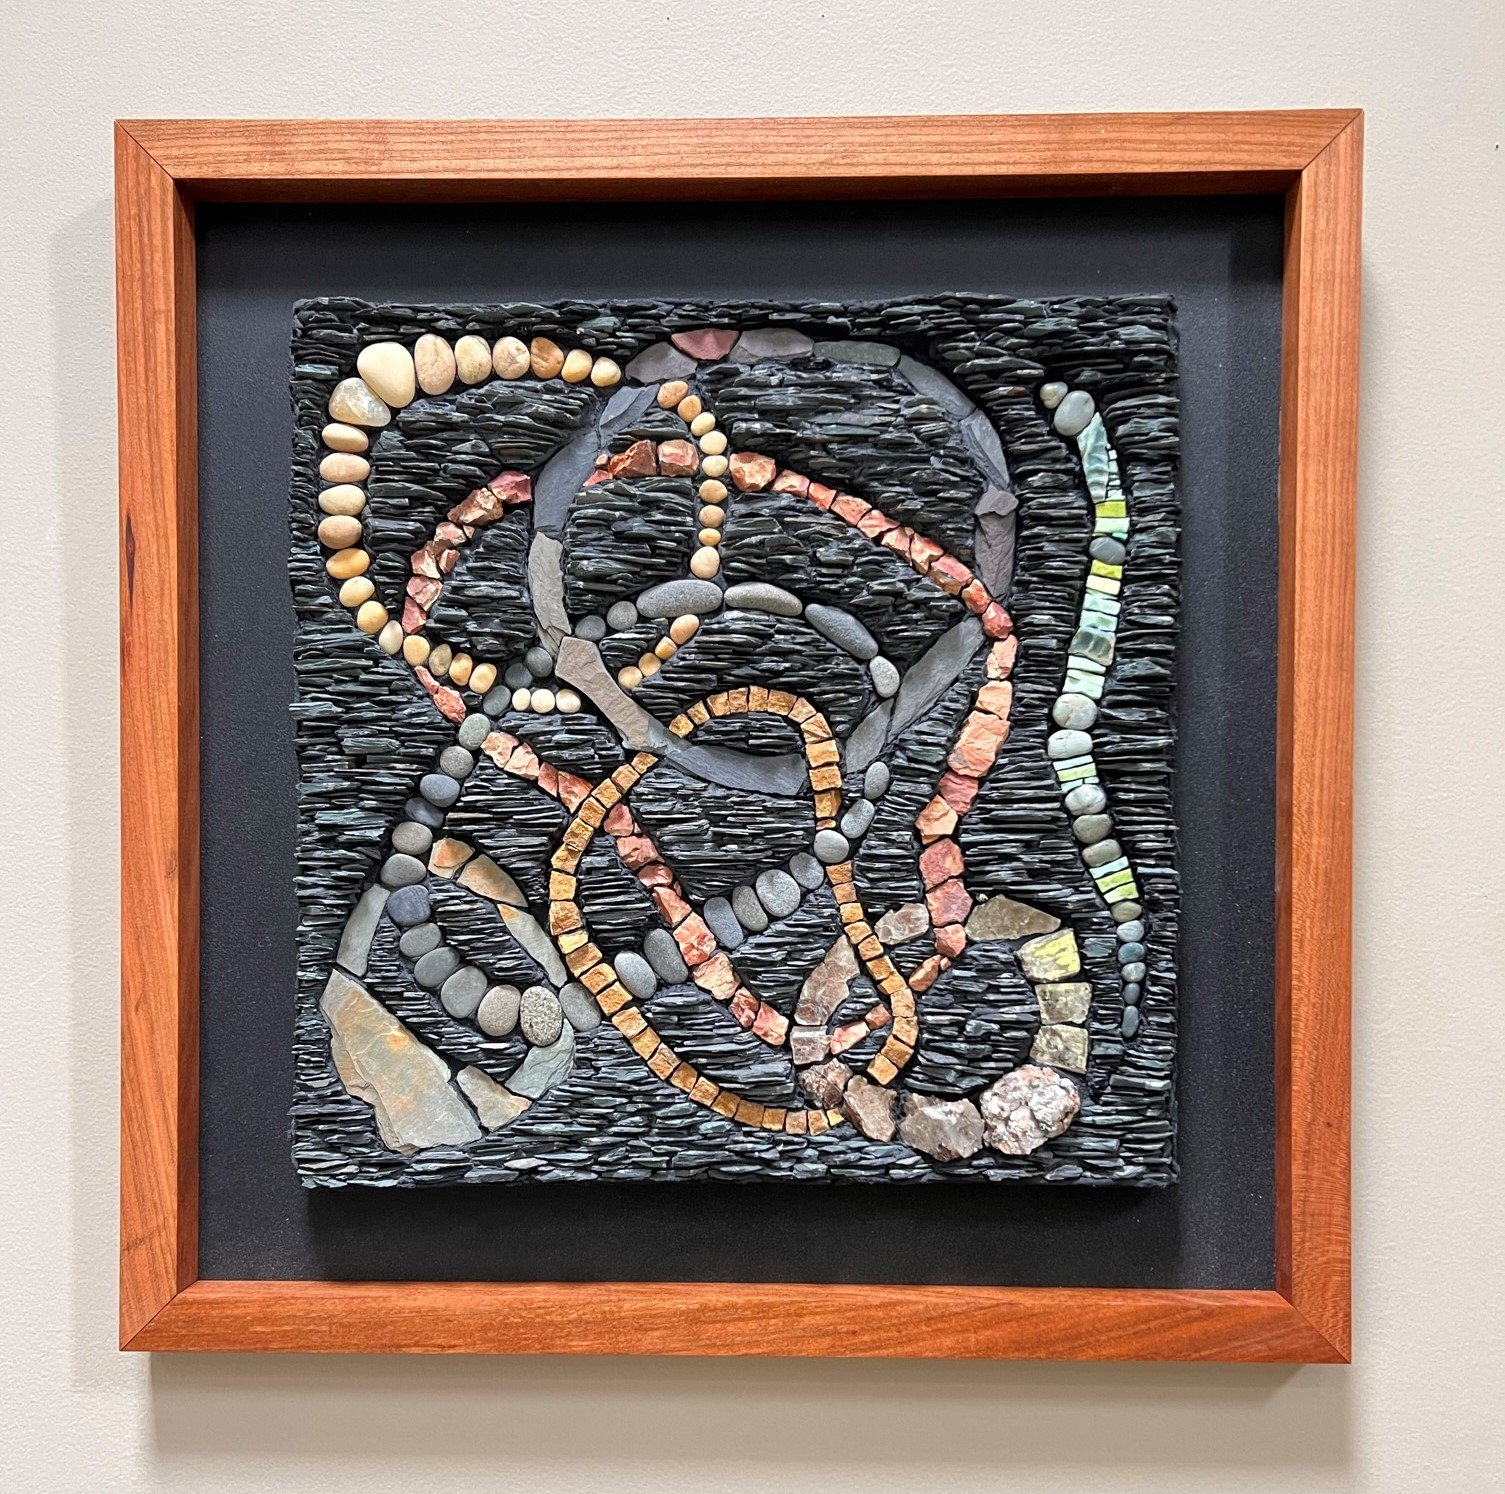
Skip to Content
GALLERY
About
Shop
Blog
FAQs
Contact
Janice Levitt Mosaics
0
0
GALLERY
About
Shop
Blog
FAQs
Contact
Janice Levitt Mosaics
0
0
GALLERY
About
Shop
Blog
FAQs
Contact
Shop Connected
z  - connected a.JPEG Image 1 of 9
z  - connected a.JPEG
z- connected b FRAMED.jpeg Image 2 of 9
z- connected b FRAMED.jpeg
z - connected g.JPEG Image 3 of 9
z - connected g.JPEG
z - connected d.JPEG Image 4 of 9
z - connected d.JPEG
z - connected f.JPEG Image 5 of 9
z - connected f.JPEG
z  - connected e.JPEG Image 6 of 9
z  - connected e.JPEG
z - connected c.jpg Image 7 of 9
z - connected c.jpg
z - connected b.jpg Image 8 of 9
z - connected b.jpg
https://www.youtube.com/watch?v=ZfQwR7u8Vd8 Image 9 of 9
https://www.youtube.com/watch?v=ZfQwR7u8Vd8
z  - connected a.JPEG
z- connected b FRAMED.jpeg
z - connected g.JPEG
z - connected d.JPEG
z - connected f.JPEG
z  - connected e.JPEG
z - connected c.jpg
z - connected b.jpg
https://www.youtube.com/watch?v=ZfQwR7u8Vd8

Connected

Sale Price:$1,275.00 Original Price:$1,500.00
sale
  • Hand-designed with slate, sandstone, mica, mica stones, red dog, pebbles, red dog, pebbles, ceramic, and smalti.

  • 20” x 20” with custom oak frame.

FULL DETAILS

Add To Cart
  • Hand-designed with slate, sandstone, mica, mica stones, red dog, pebbles, red dog, pebbles, ceramic, and smalti.

  • 20” x 20” with custom oak frame.

FULL DETAILS

  • Hand-designed with slate, sandstone, mica, mica stones, red dog, pebbles, red dog, pebbles, ceramic, and smalti.

  • 20” x 20” with custom oak frame.

FULL DETAILS

Click anywhere on the image to view larger.

Mobile users: swipe left on the image to see the framed piece and detail shots.


You Might Also Like

Cycles of Life cyclesfull.jpg close 1.JPEG close 2.JPEG close 3.JPEG close 4.jpeg close 5.jpeg close 6.jpeg
Cycles of Life
Sale Price:$1,275.00 Original Price:$1,500.00
sale

Sign up to receive email updates and be the first to know when new work is available.

Thank you. Please check your email and confirm your subscription.

Shop
About
FAQs

Read the Blog

Explore the Gallery
Contact